PowerupStack
Changing the region of your instance can help optimize performance, reduce latency, or align with data residency requirements. Whether you selected the wrong region during setup or simply want to relocate your instance, our platform makes it easy to switch.
Choose an available region
The available locations can change as capacity expands. Open the region selector in your instance dashboard to see the current regions and tiers available to your instance. Choose the location closest to most players for the lowest likely latency.
How to change the region
Go to your instance dashboard.
Locate the instance you want to update and open its dashboard page.Find the region setting.
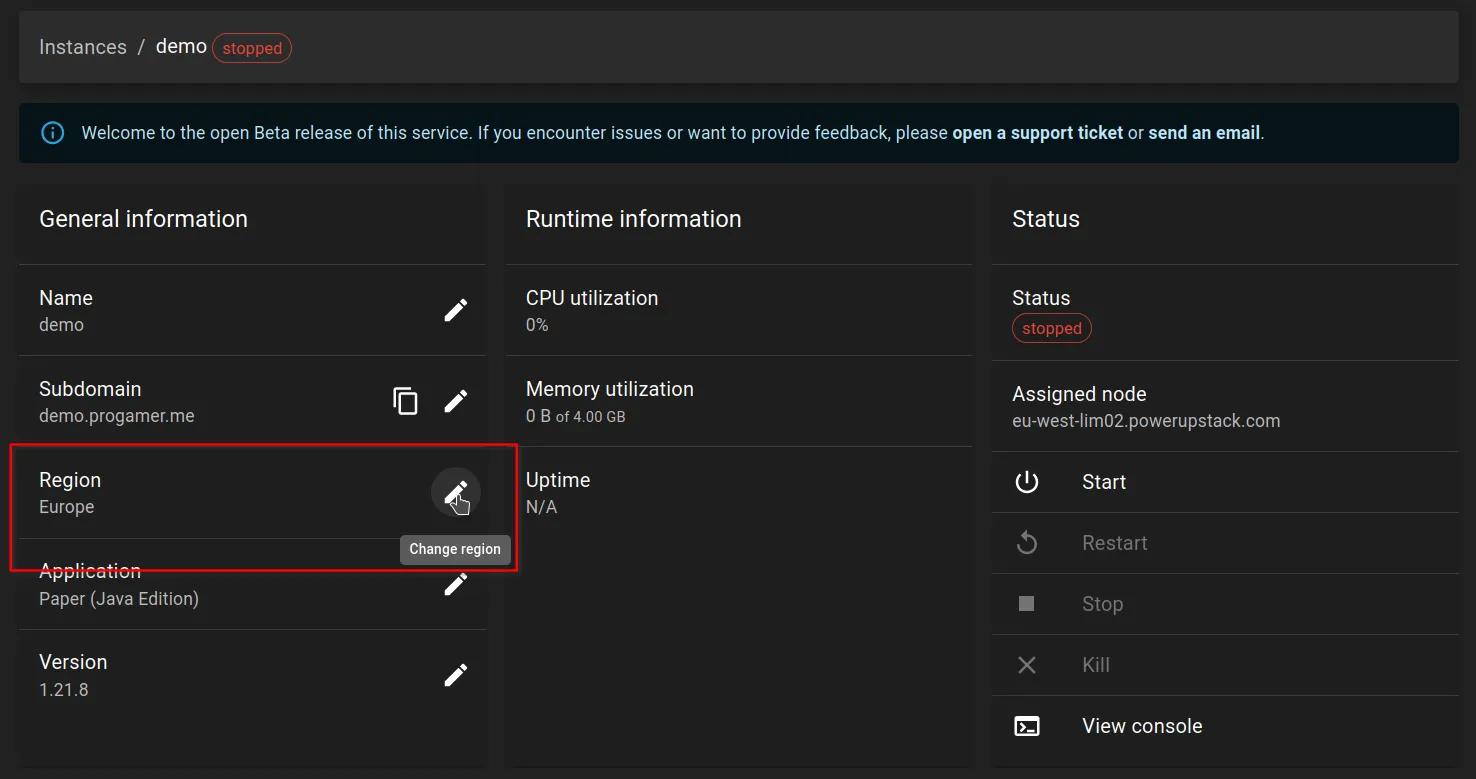
Look for the section labeled “Region” and click the Edit button next to it.Select a new region.
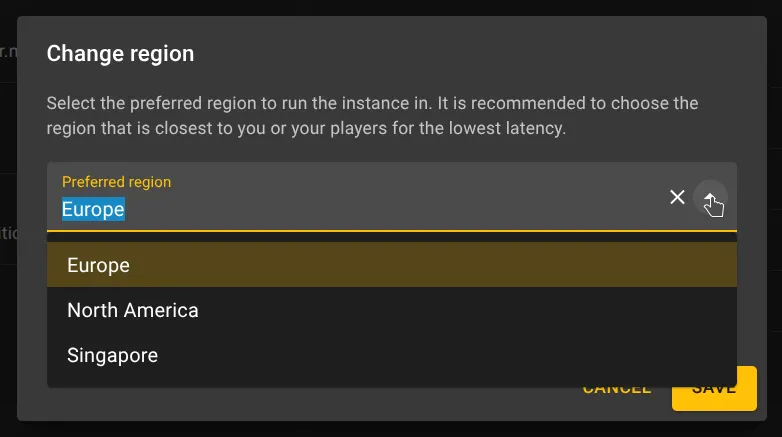
A dialog will appear with a dropdown menu listing the available regions. Choose your desired region from the list.Save your changes.
Click Save to confirm your selection.
What happens next?
The region change will take effect the next time you start the instance. If there is sufficient capacity in the selected region, your instance will be relocated automatically. If capacity is temporarily unavailable, the instance will remain in its current region until space opens up.
Visual guide
Use the screenshots below to walk through the process of changing your instance’s region, step by step.
Step 1: Locate the region setting
Go to your instance dashboard and find the section labeled Region. Click Edit to change it.
Step 2: Choose a new region
In the dialog that appears, select your preferred region from the dropdown menu. Click Save to apply your changes.